Check if Element is in Viewport (JS / TypeScript)
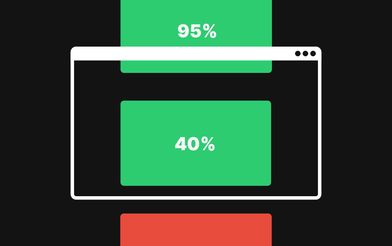
As web developers, we often need to add dynamic effects to our websites to enhance the user experience. One such effect is to display the scroll distance of an element when it is in the viewport. In this blog post, we will explore a code snippet that checks if an element is in the viewport and if it is, shows its scroll distance in percentage.
/**
 * check if element is partially or fully in viewport
 * @param {Element} el
 * @returns {boolean}
 */
function isInViewport(el: Element) {
  const rect = el.getBoundingClientRect();

  return (
    rect.top <= (window.innerHeight || document.documentElement.clientHeight) &&
    rect.bottom >= 0
  );
}
Let’s begin by understanding the isInViewport function. This function takes an Element as a parameter and returns a boolean value indicating whether the element is partially or fully in the viewport. The function achieves this by using the getBoundingClientRect method to get the element’s size and position relative to the viewport. The function then checks if the element’s top position is less than or equal to the viewport’s height and if the element’s bottom position is greater than or equal to zero. If both these conditions are true, the function returns true, indicating that the element is in the viewport.
/**
 * get scrolled distance in percentage
 * @param {HTMLElement} el
 * @returns {number}
 */
function getScrolledPercentage(el: Element) {
  const rect = el.getBoundingClientRect();
  const windowHeight =
    window.innerHeight || document.documentElement.clientHeight;
  const scrollHeight = window.pageYOffset || document.documentElement.scrollTop;
  const elementTop = rect.top + scrollHeight;
  const elementBottom = elementTop + el.clientHeight;
  const scrolledDistance = elementBottom - scrollHeight;
  const totalDistance = el.clientHeight + windowHeight;
  const scrolledPercentage =
    (scrolledDistance / totalDistance) * 100 * -1 + 100;

  return scrolledPercentage;
}
The getScrolledPercentage function is used to calculate the percentage of the element that has been scrolled. This function takes an Element as a parameter and returns the scrolled percentage. To calculate the scrolled percentage, the function first uses the getBoundingClientRect method to get the element’s size and position relative to the viewport. It then calculates the window’s height and the current scroll height. Using this information, the function calculates the element’s top and bottom positions relative to the document. It then calculates the scrolled distance by subtracting the scroll height from the element’s bottom position. Finally, it calculates the total distance by adding the window’s height and the element’s height and calculates the scrolled percentage as a percentage of the total distance.
tilesScrollEffect();
document.addEventListener("scroll", (e) => {
  tilesScrollEffect();
});

function tilesScrollEffect() {
  const tiles = document.querySelectorAll(".tile");
  tiles.forEach((tile) => {
    if (isInViewport(tile)) {
      // get scrolled distance with getScrolledDistance function
      const scrolledDistance = getScrolledPercentage(tile);

      tile.innerHTML =
        "Scrolled Distance: " + scrolledDistance.toFixed(2) + " %";
    }
  });
}
Now let’s look at the tilesScrollEffect function. This function is responsible for updating the scroll distance of each .tile element that is in the viewport. It first gets all the .tile elements using the querySelectorAll method. It then loops through each tile and checks if it is in the viewport using the isInViewport function. If the tile is in the viewport, the function calls the getScrolledPercentage function to calculate the scrolled distance percentage. Finally, the function updates the tile’s HTML to display the scrolled distance percentage using the innerHTML property.
Lastly, the code adds an event listener to the document object to listen for the scroll event. When the user scrolls the page, the tilesScrollEffect function is called to update the scroll distance of each .tile element that is in the viewport.
n conclusion, the code snippet provided above is a useful tool for web developers looking to add dynamic effects to their websites. By understanding how this code works, you can create your own scroll-based effects and improve your users’ experience on your website.
Comments
More posts in Development

Learn how to setup Nuxt 3 and 4 with Lucia Auth and Artic Social Login with Prisma in 2025.

Learn the differences between Payload CMS and WordPress. Explore the features, benefits, and use cases of each CMS.

Learn the differences between Payload CMS and TYPO3. Explore the features, benefits, and use cases of each CMS.